Veracross Composer is a powerful communications tool built into NIST’s Veracross student information system. It allows NIST staff members to create flexible, engaging emails and posts with a user-friendly drag and drop template. Depending on your role in the school, you will have access to different channels and levels of permission for creating content.
Creating and posting/sending content can be done in a few simple steps.
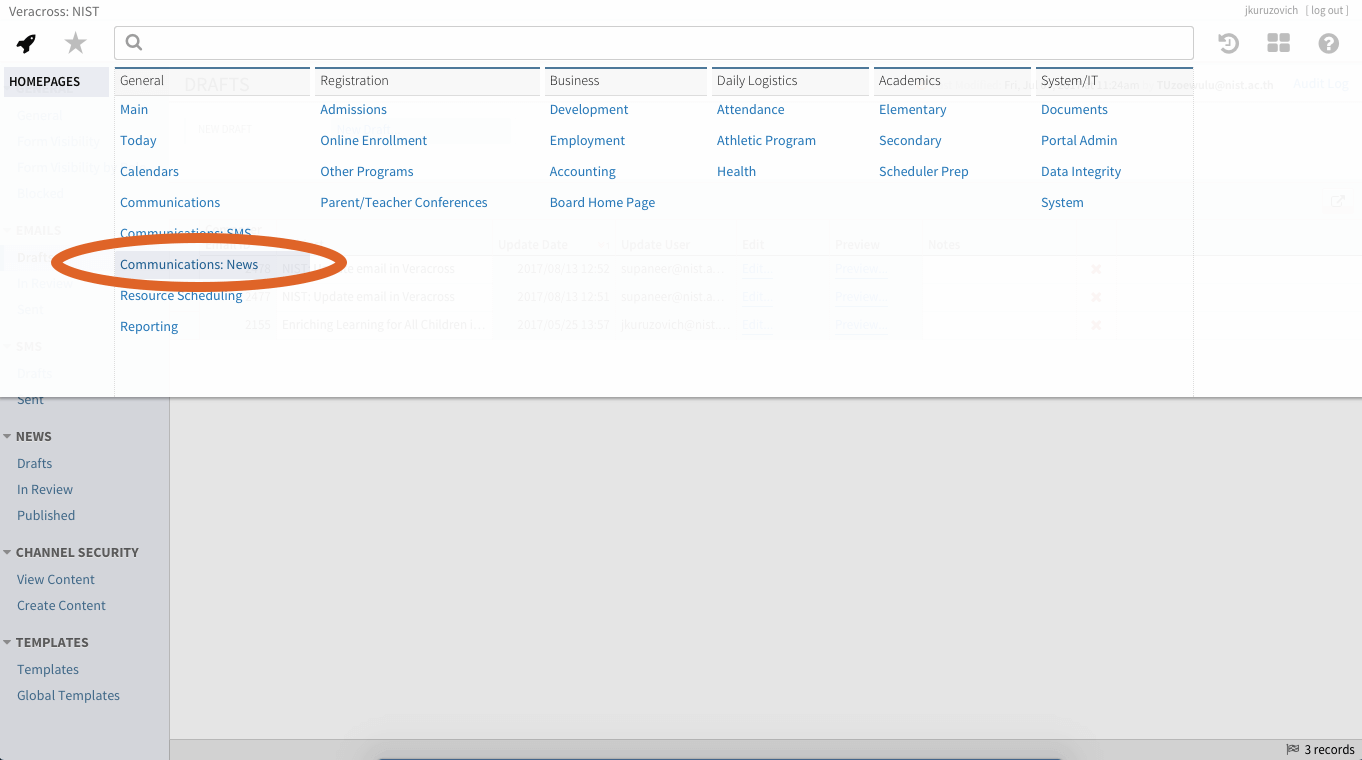
1: Navigate to the Communications: News Page in Axiom
If you have been given access to the communications tools based on your role in the school, it will appear in your menu, accessible through the spaceship icon in Axiom. Though both the general Communications and Communications: News tabs will display, it is recommended that you use Communications: News, as both emails and portal posts can be made through it.
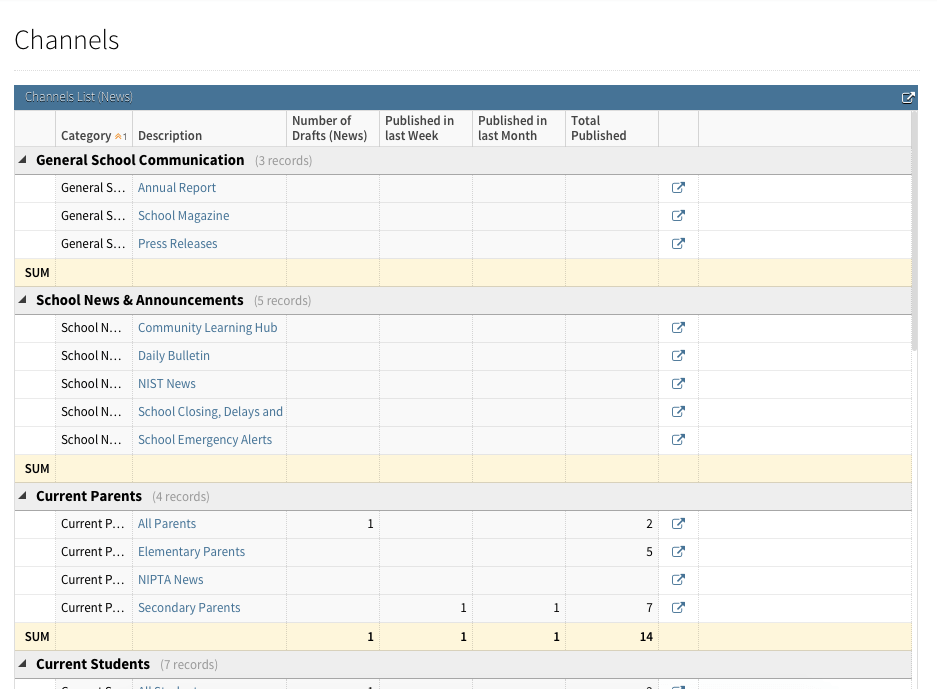
2: Select the Appropriate Channel
Upon reaching the communications page, scroll down to see the list of available channels in your category (department). Channels simply refer to the audience of the email that you would like to create. Click the title of the channel to select it.
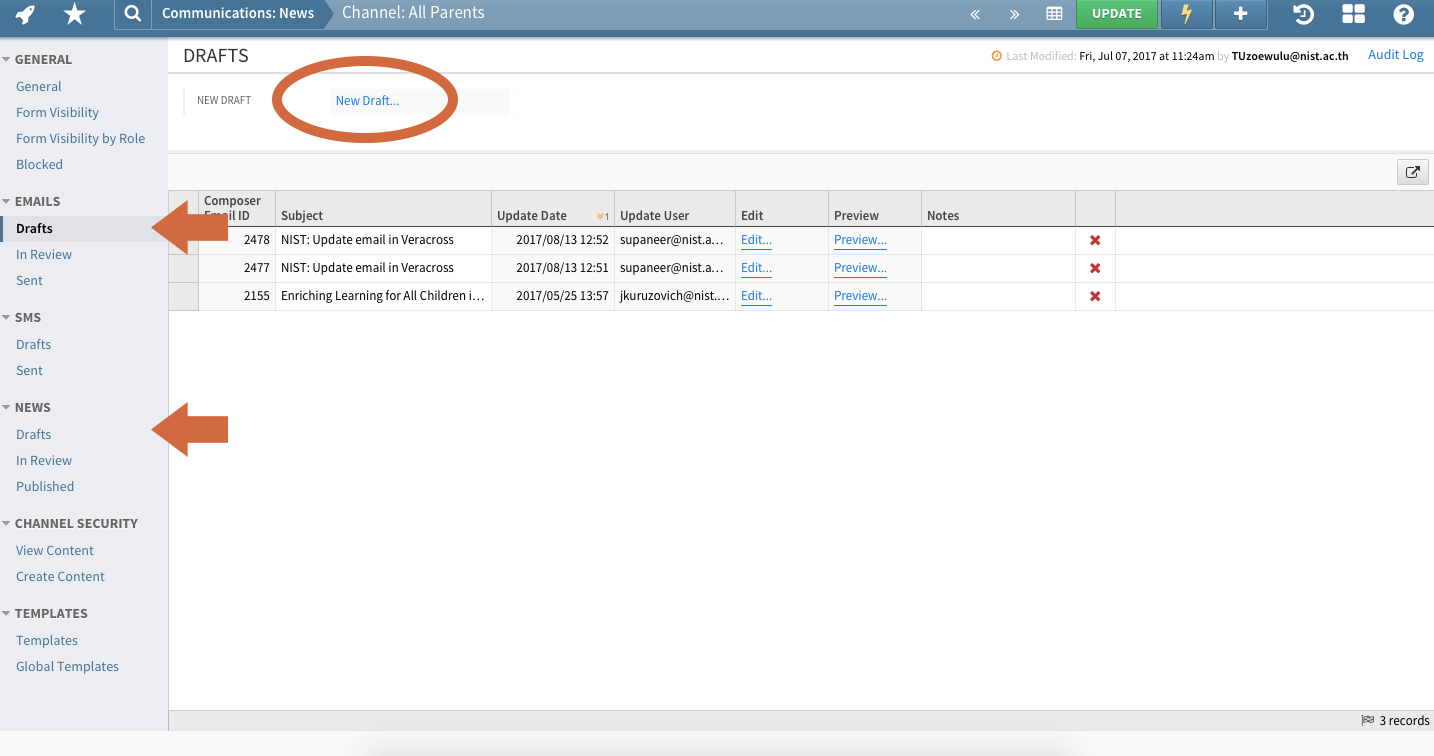
3: Create a New Draft
After choosing the channel, click on Drafts under the Emails or News category, and select “New Draft…”:
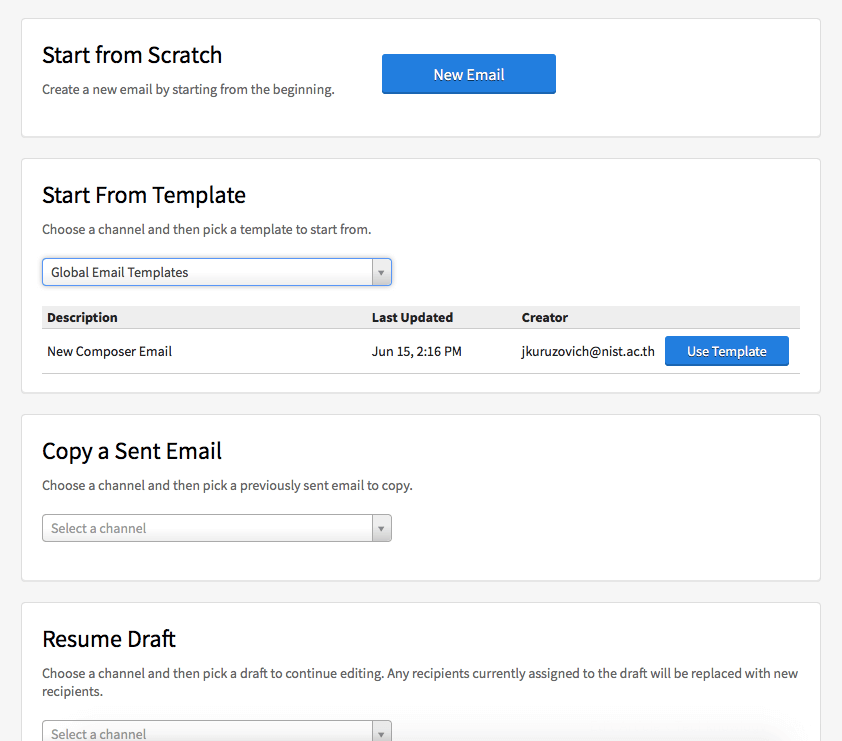
If you are creating a news article, you simply need to add the appropriate content using the drag-and-drop interface, and then review and publish it. Step 4 onward applies only to emails.
If you are creating an email, at this point you will have several options: creating an entirely new email, using an existing template or copying a past email. If you are not copying a past email, choose Start From Template –> Global Email Templates –> New Composer Email. This will provide pre-formatted content for you to make it easier.
4: Create Email

Channel: This refers to the type of communication you are sending. Depending on your role in the school, you will likely be working with only two or three channels.
Subject: This is simply the subject line of your email. Note the General Email Guidelines for NIST communications.
Editor Type: Drag & Drop, the default, is recommended.
Who is it from?: You have three options for this step. It is recommended that those tasked with large communications use the Custom option.
- Myself: The email will be shown as coming from your own account.
- On Behalf: This will allow you to send the email for accounts that you have been given access to.
- Custom: The email will be shown as coming from the individual/department that you choose, and replies will go to the email address you enter. You must select this option if you are sending on behalf of a person or group, or you will appear as the sender in Veracross message inboxes.
5: Write Content
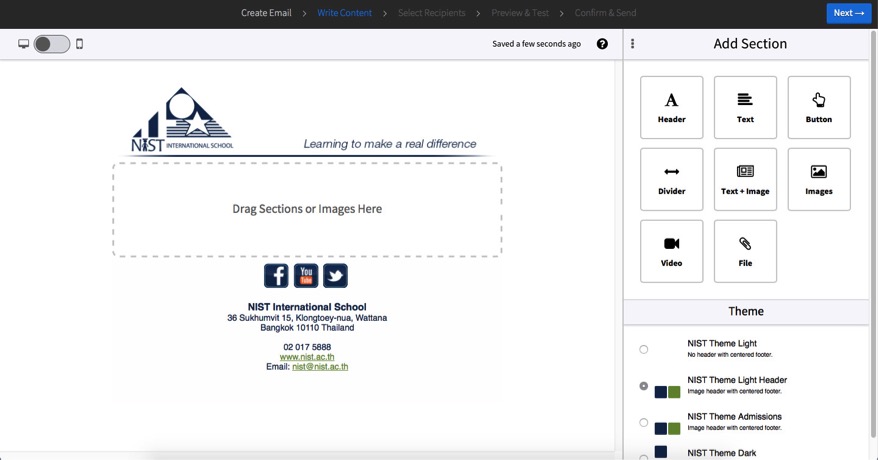
This step is where most of the work is done in putting together your email. First you should select a theme from the bottom right; NIST Theme Light Header (selected in the image above) is appropriate for almost all emails that will be sent.
You are then ready to begin dragging and dropping elements to craft your email. Please refer to the NIST Style Guide to make sure proper formatting is used!
- Header: The standard used for headers in NIST emails (if used) is small text size, bold weight and the secondary NIST green color (#6f8f3a). This should be left-aligned, not centered.
- Text: In longer communications such as NIST News, the default font size is appropriate. Shorter emails should be increased to 14px. In all text boxes in which it is an option, select Justify for the alignment. One, two or three text columns can be used. On a mobile, these will collapse into a single column.
- Button: All buttons, regardless of number, should use Full alignment and the secondary NIST orange color (#df6428).
- Divider: Use a divider to separate elements that are close together, including after buttons and before the footer content (the social media icons). In NIST News, it should also be used before any new sections. (You may want to reduce the amount of space before and after the divider. 10 or 15 is sufficient.)
- Text & Image: This section is appropriate if a low resolution image is being used. Unlike most other sections with text, this does not allow Justify as an alignment option.
- Images: One, two or three images can be selected. It is recommended that any images used be at least 800 pixels in width. On a mobile, these will collapse into a single column.
- Video: This does not insert a video, but rather allows you to link to one and create an image.
- File: This allows you to upload a file such as a PDF to the email or a link to a file hosted elsewhere, including on Google Drive. The text link that is created should use the secondary NIST orange color (#df6428).
Note that the maximum file size (including attachments) for any email sent through Veracross is 8 MB. It is highly recommended that that you compress images (TinyPNG) and PDF files (ILovePDF) if including them.
6: Select Recipients
At this point you will need to select the email recipients. These groups are based on Veracross groupings. Existing groups that are often used include:
- Parent Groups
- All Parents
- Parents w/students in Elementary
- Parents w/students in Secondary
- Parents w/students in Year #
- Student Groups
- All Current Students
- Students in Elementary
- Students in Secondary
- Students in Year #
- Staff Groups
- All Staff & Faculty
- All Staff
- All Faculty
- NIST Full-Time Staff & Faculty
- NIST Full-Time Faculty
Please note that some others groups that display in searches are not updated. If you need to know whether a group should be used, contact the IT or Communications Department.
7: Preview & Test
A preview of your finished email will appear at this point, allowing you to see how it will look for recipients. You can also send this preview to your email address and/or any others. Multiple email addresses should be separated with a comma or semicolon.
8: Confirm & Send
This is the final step of the process, and it will allow you to review your subject line, and sender and recipient of replies. Please note that based on the permissions you have been granted, you may need to have the email approved after it is submitted.