Zoom Meeting is used by NIST as a way to meet online in a secure platform. Teachers have Licensed accounts. Meetings can have up to 300 participants.
Zoom Settings for Everyone
- Be sure to set your authentication settings correctly based on your participants.
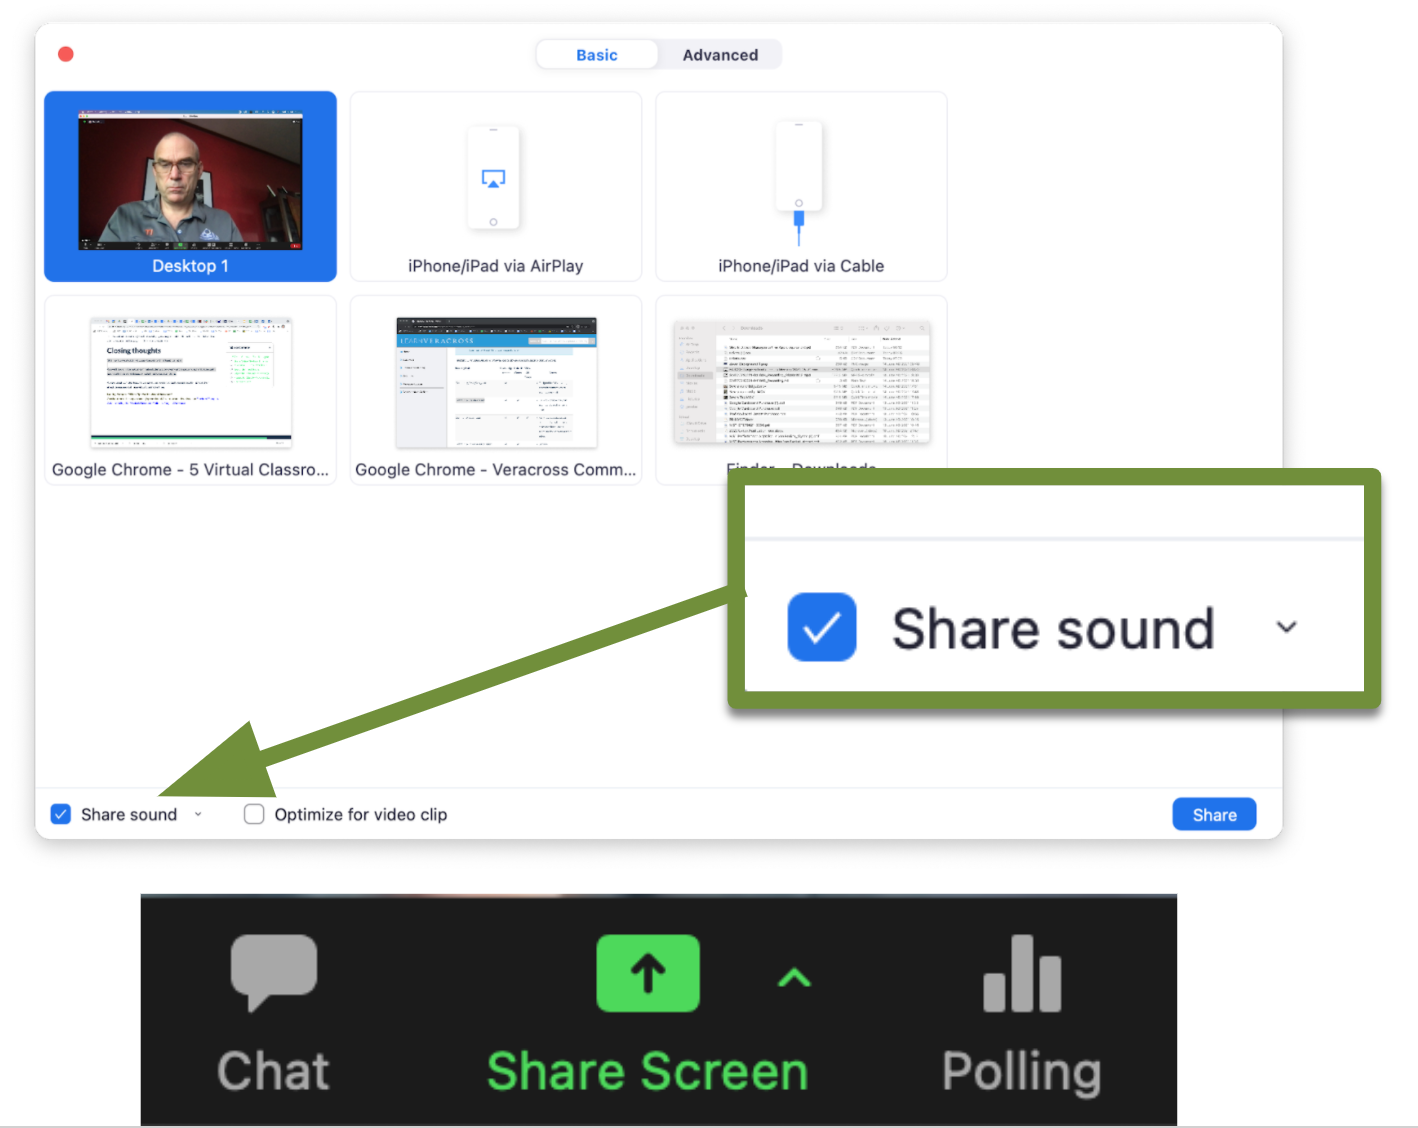
- When sharing video or audio, please click Share Screen, then be sure to tick “Share sound” tickbox before clicking Share button.
Zoom Guide (for Elementary Students)
- Class Zoom iPad Setup Video for setup steps. This video shows how to open the app for the first time on a NIST iPad, set student name, and accept all pop-ups.
- Watch this short video which explains how Ele students use Zoom. This video shows the student how to join with the Class Zoom icon, mute/unmute mic, raise their hand, and how to leave the meeting.
- If a student switches to another application on their iPad, his/her video will stop, so you can ask them to switch back to Zoom.
- Students should never start a meeting of their own. They should only join the class teacher meeting.
- You will need to use a non-NIST device.
- Get the Zoom Client for Meetings from Zoom downloads page on a computer or the Zoom Mobile app from Zoom downloads page on a tablet or mobile phone.
- Do NOT create a Zoom account. Do NOT sign in.
- Your Homeroom Teacher will provide you with a link to join the Class Zoom meeting at the assigned time.
- If you need to use a non-NIST device, get the Zoom Client for Meetings or Zoom Mobile app from Zoom downloads page for the device you have (can be computer, tablet, or phone).
- Do NOT create a Zoom account. Do NOT sign in.
- Your Homeroom Teacher will provide you with a link to join the Class Zoom meeting at the assigned time.
Zoom Guide (for Secondary Students)
- There is a guide here for students
Zoom Settings (For Ele Teachers & AAs)
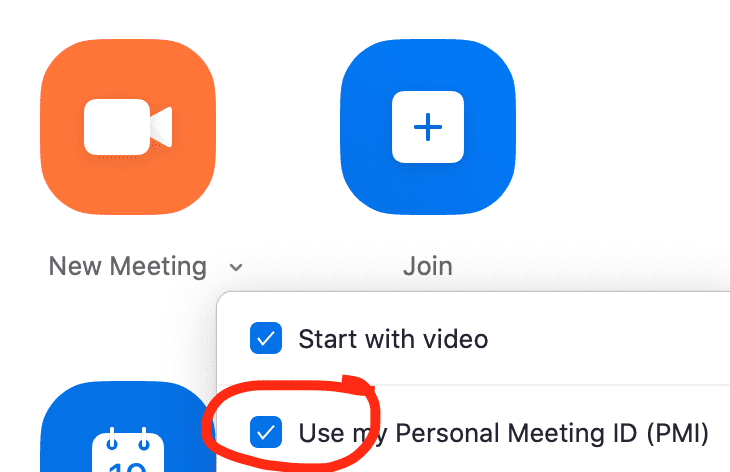
- All teachers need to tick the Use my Personal Meeting ID tickbox on every new device that you use to host any meeting
- Use “Sign in with Google” whenever asked to log in to Zoom.
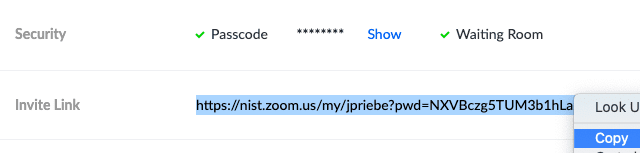
- Copy your personal meeting URL and keep it handy. Go to https://zoom.us/meeting then click on Personal meeting room.

Zoom Settings (For WL Teachers)
- Use “Sign in with Google” whenever asked to log in to Zoom.
- All teachers need to tick the Use my Personal Meeting ID tickbox on every new device that you use to host any meeting.
- Your personal meeting room link will show up as an icon on your students’ iPads in elementary (If you also teach secondary classes, please see below).
- Please ensure that this setting is ticked whenever hosting secondary classes because secondary students are required to login to their NIST Zoom account to attend your classes. You can find this setting in Zoom.us site > Meetings > Personal Meeting then click Edit button. Note: You will need to untick this box whenever you need to host a meeting for people outside of NIST or elementary students.

- In a Meeting:
- Sit with dark background behind you.
- Earbuds work best for audio but not required.
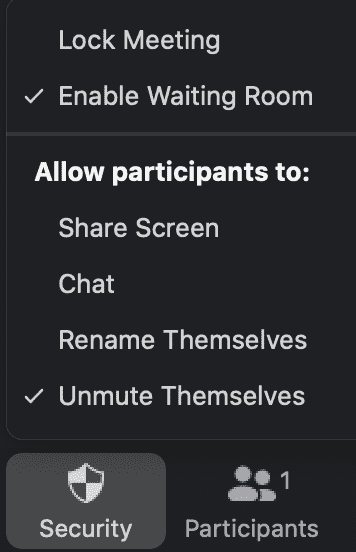
- The Security button has these controls. We recommend the following. You can enable screen share or chat when needed. Mitch explains settings in the middle of this video.

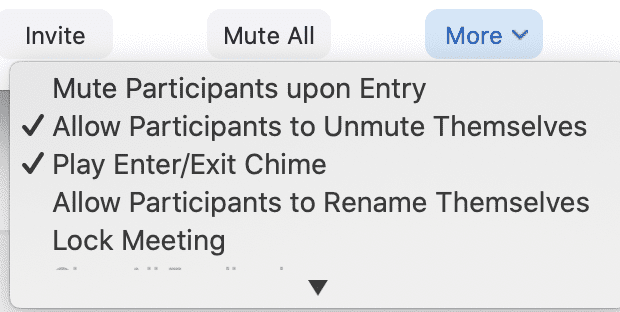
- You can make it so that participants are muted when they join. You can also mute one participant or all participants.

- Share Screen or Share Content – You (or your students) can share your whole Desktop or just a certain application or Chrome window into the Zoom meeting. If sharing video, be sure to “Share Sound.”
- See Pro Tips below for how to get the most out of Zoom with your class.
Zoom Settings (for Sec Teachers)
- Use “Sign in with Google” whenever asked to log in to Zoom.
- All teachers need to tick the Use my Personal Meeting ID tickbox on every new device that you use to host any meeting.
- Please ensure that this setting is ticked whenever hosting secondary classes because secondary students are required to login to their NIST Zoom account to attend your classes. You can find this setting in Zoom.us site > Meetings > Personal Meeting then click Edit button. Note: You will need to untick this box whenever you need to host a meeting for people outside of NIST or elementary students.
- Copy your personal meeting URL and keep it handy. Go to https://zoom.us/meeting then click on Personal meeting room.
- Your Personal Zoom Meeting ID is automatically placed into your Veracross classes. Students then see your Virtual Meeting link on their Daily Schedule page.
- In a Meeting:
- Sit with dark background behind you.
- Earbuds work best for audio but not required.
- Click on Participants (so you can see who is in the room).
- The Security button has these controls. We recommend the following. You can enable screen share or chat when needed. Mitch explains settings in the middle of this video.
- You can make it so that participants are muted when they join. You can also mute one participant or all participants.
- Share Screen or Share Content – You (or your students) can share your whole Desktop or just a certain application or Chrome window into the Zoom meeting. If sharing video, be sure to “Share Sound.”
- See Pro Tips below for how to get the most out of Zoom with your class.
Pro Tips
Using Airplay to share iPad screen to Zoom meeting
Share an iPad screen in Zoom to share writing/drawing (use a notetaking app, use the camera, etc.).
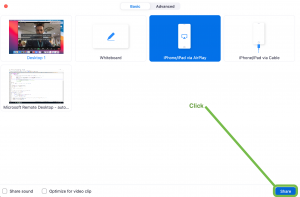
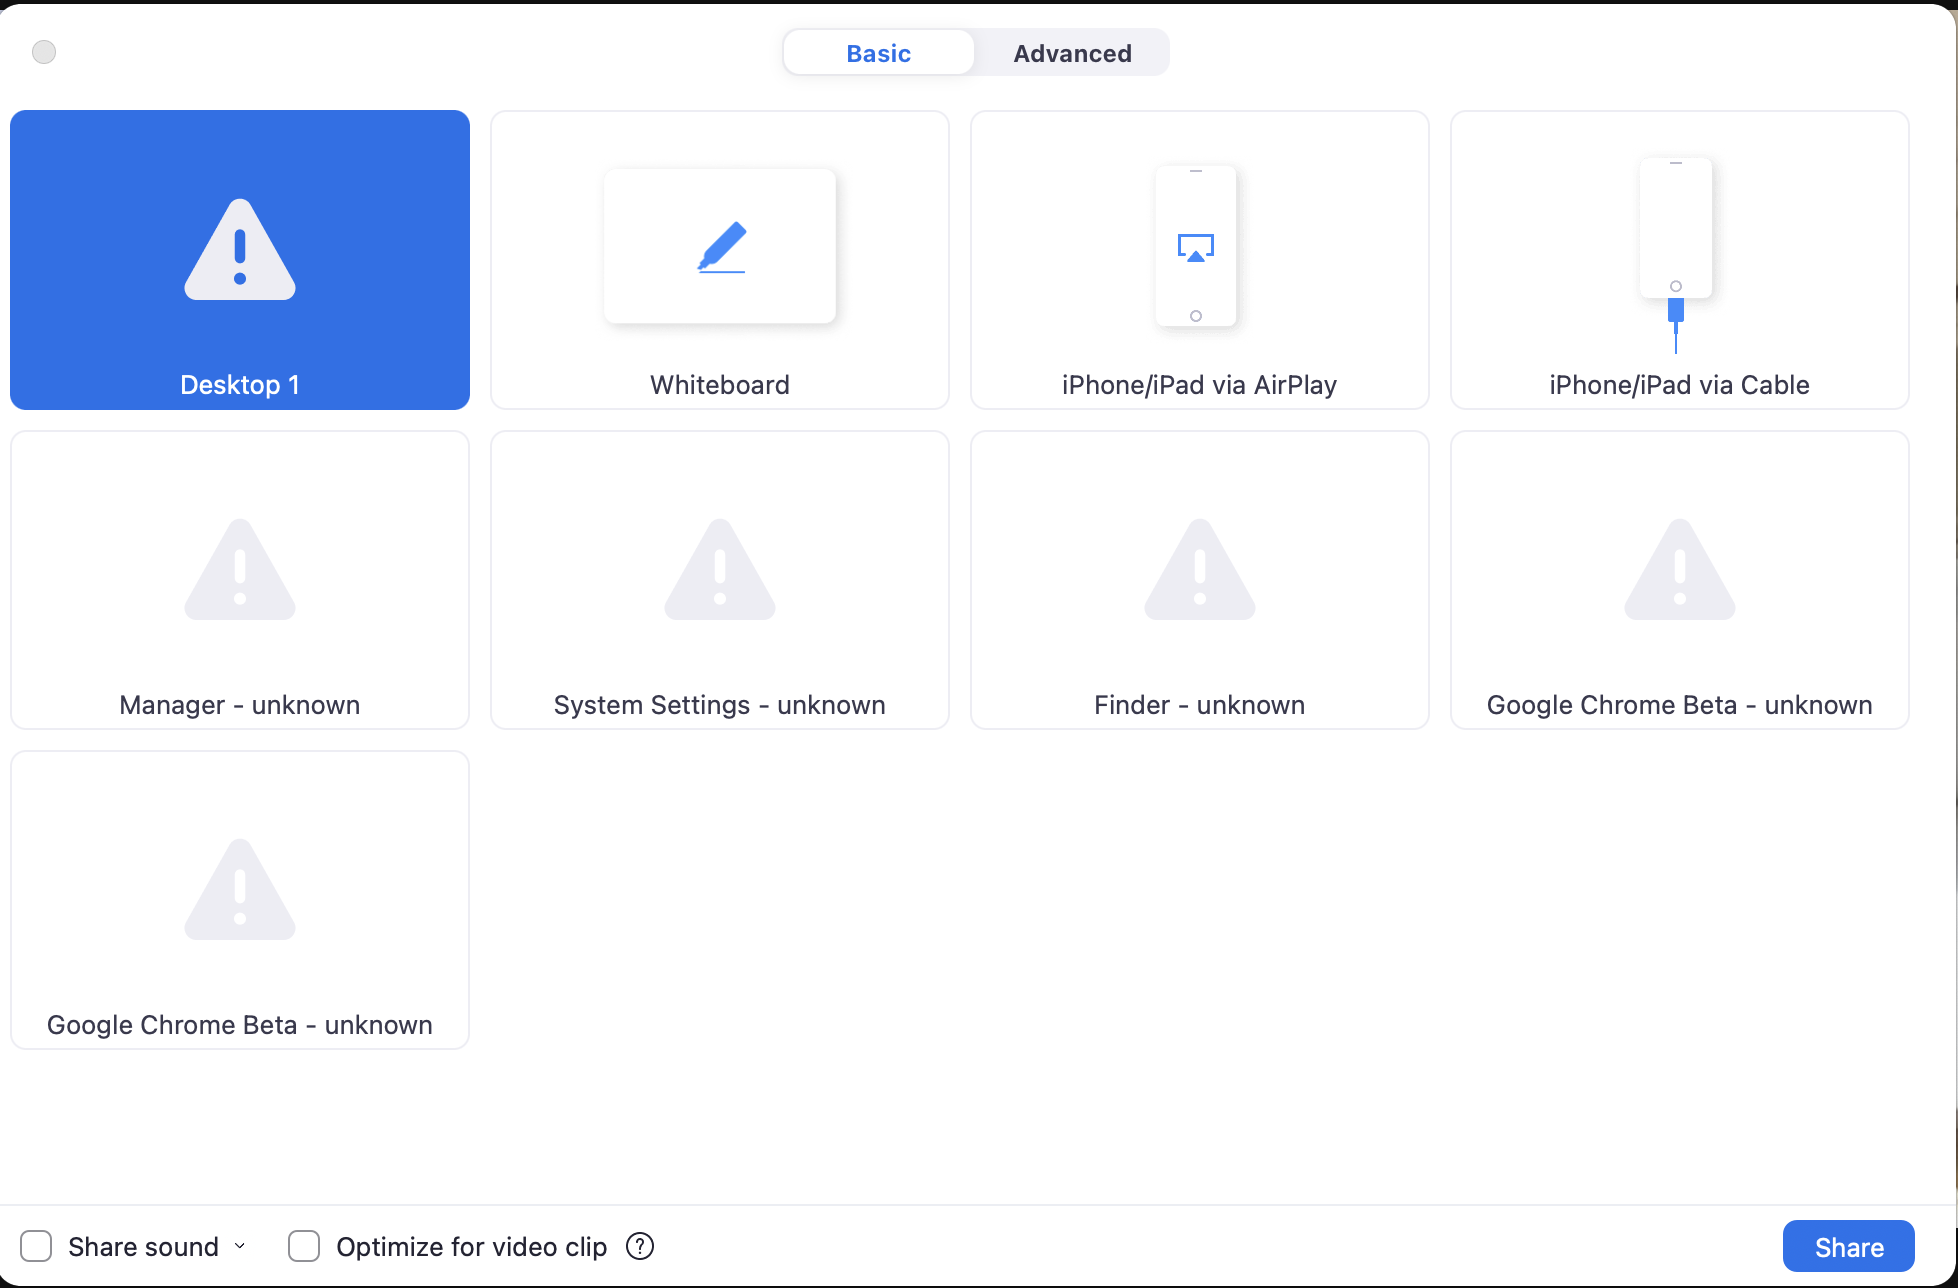
- During a Zoom meeting hosted from your Macbook, press the Share Screen button at the bottom of the screen.
- The share menu will appear as shown below.
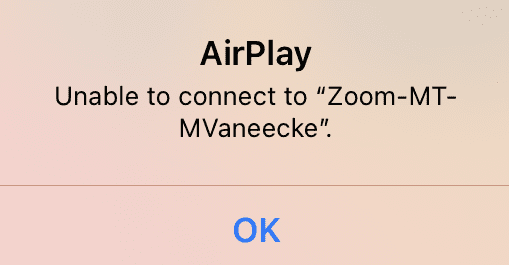
Select iPhone/iPad via AirPlay (iPhone/iPad via Cable does not work) - Click the Share button.
- Wait a full 10 seconds for the software to start before opening the airplay menu on your iPad and connecting to the Zoom meeting with your name from the list.
- Your iPad screen should now be shared in your zoom meeting


For Group Work, use Breakout Rooms and Co-Host
- You need to turn this feature on to use it. Then read an article with a video is a great description of the Breakout Rooms feature. Zoom also allows you to pre-assign students to Breakout Rooms.

- To have a support teacher assist you in Zoom, assign that person as a co-host as they join your meeting. The Host needs to open all breakout rooms then assign the co-host to any breakout room just once. Then the co-host can record breakout rooms and use the Breakout Rooms button to join other breakout rooms.
- Add a co-teacher in Manage Participants (make co-host). More complete directions here. Using Co-host in a Meeting
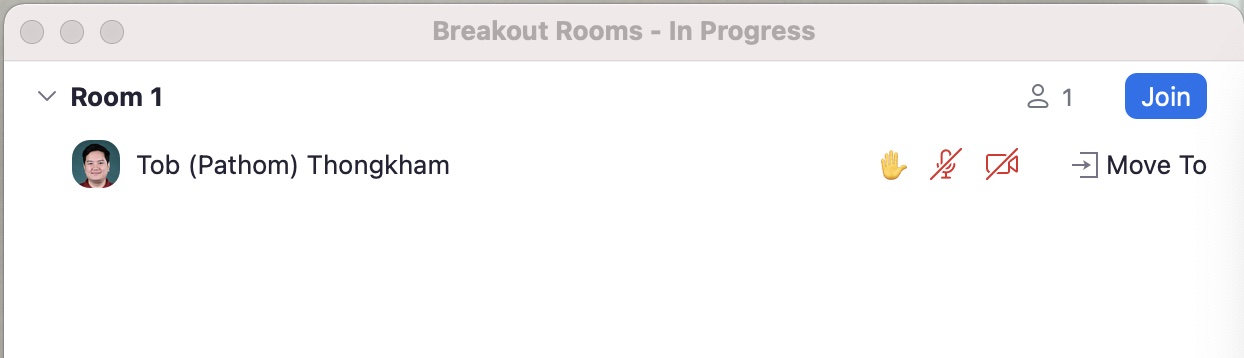
- There is a new feature in Zoom (enabled for all) that lets you view activity statuses in your Breakout rooms to know whether students are active or not. Zoom client needs to be 5.10.3 or newer.
- Participants show up (to the host only) as follows in Breakout pop-up.


Draw on an actual Whiteboard and film it from Zoom (Video)
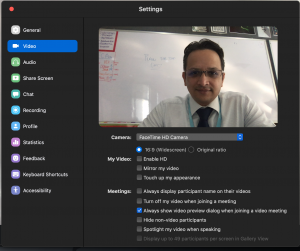
- If you want to point your camera at a whiteboard and write something, be sure to mirror your video. so that when you write on the white board, the text isn’t backwards.
- Go to the Main Menu >> zoom.us >> Click on Preferences >> then Click on Video >> Make sure the ‘Mirror my Video’ checkbox is not ticked.
- Go to the Main Menu >> zoom.us >> Click on Preferences >> then Click on Video >> Make sure the ‘Mirror my Video’ checkbox is not ticked.

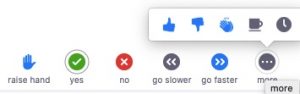
Non-verbal feedback
- Participants can provide non-verbal feedback and express one opinion at a time by clicking on icons in the Participants panel. Teacher can clear the feedback. Other students can see the feedback.
-

Pause Share
- Pause your screen share while you use your computer for other things (like taking attendance in Veracross).

Multi-pin and Multi-spotlight
- The host can spotlight up to 9 participants for everyone in their meeting. Useful for students doing presentations.
More Pro Tips
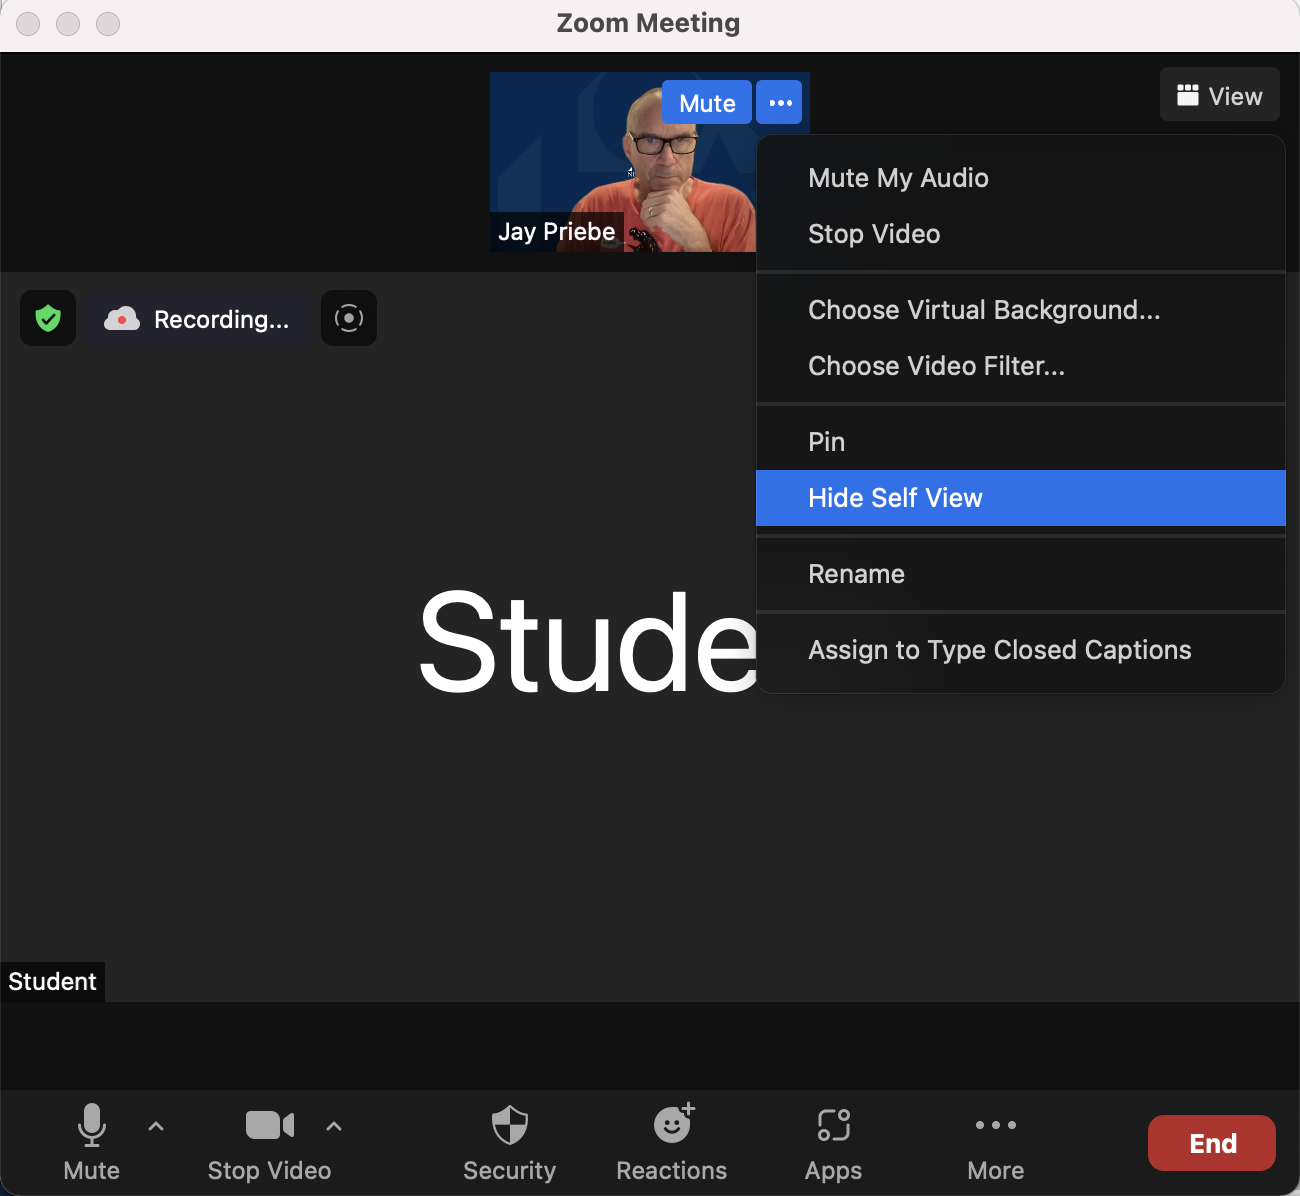
Hide Self View
- If you do not want to see your own video (or your child to see their own video), you can Hide Self View.
- In any view where you can see your own video thumbnail, click on the elipsis to reveal a menu.
- Choose Hide Self View.
- To show again, hover anyone else’s video >> elipsis >> Show Self View.
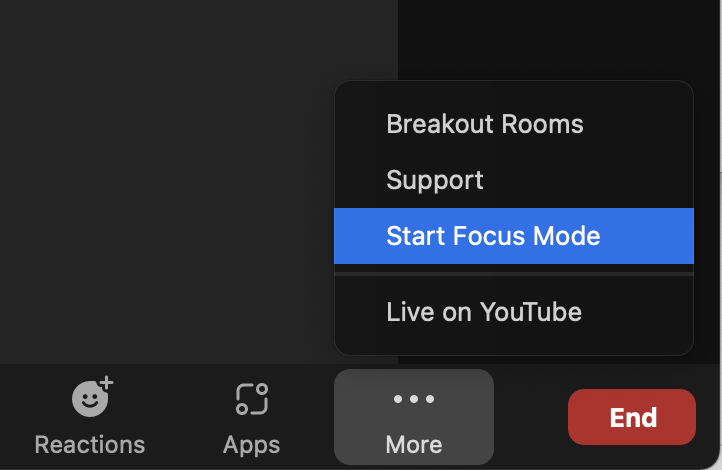
Focus Mode
- Focus Mode shows only hosts and co-hosts’ videos (or profile pictures) during a meeting.
- “Focus mode is designed with the digital learning environment in mind, allowing students to stay attentive or work on their tasks while under supervision, without being distracted by others and their tasks. This feature gives the host and co-hosts view of all participants’ videos without other participants seeing each other. “
- Focus Mode can only be turned on by host and co-hosts.
- Start Focus Mode (and Stop Focus Mode) can be found in the “More” menu in the in-meeting toolbar (bottom of Zoom app).
- Participants are notified when you turn on Focus Mode but not when you stop it. Focus Mode DOES NOT function in Breakout rooms.
- Be sure to balance the need for focus times with the need for students to connect within your classes. With this feature, teachers do not need to ask students to turn off their cameras.
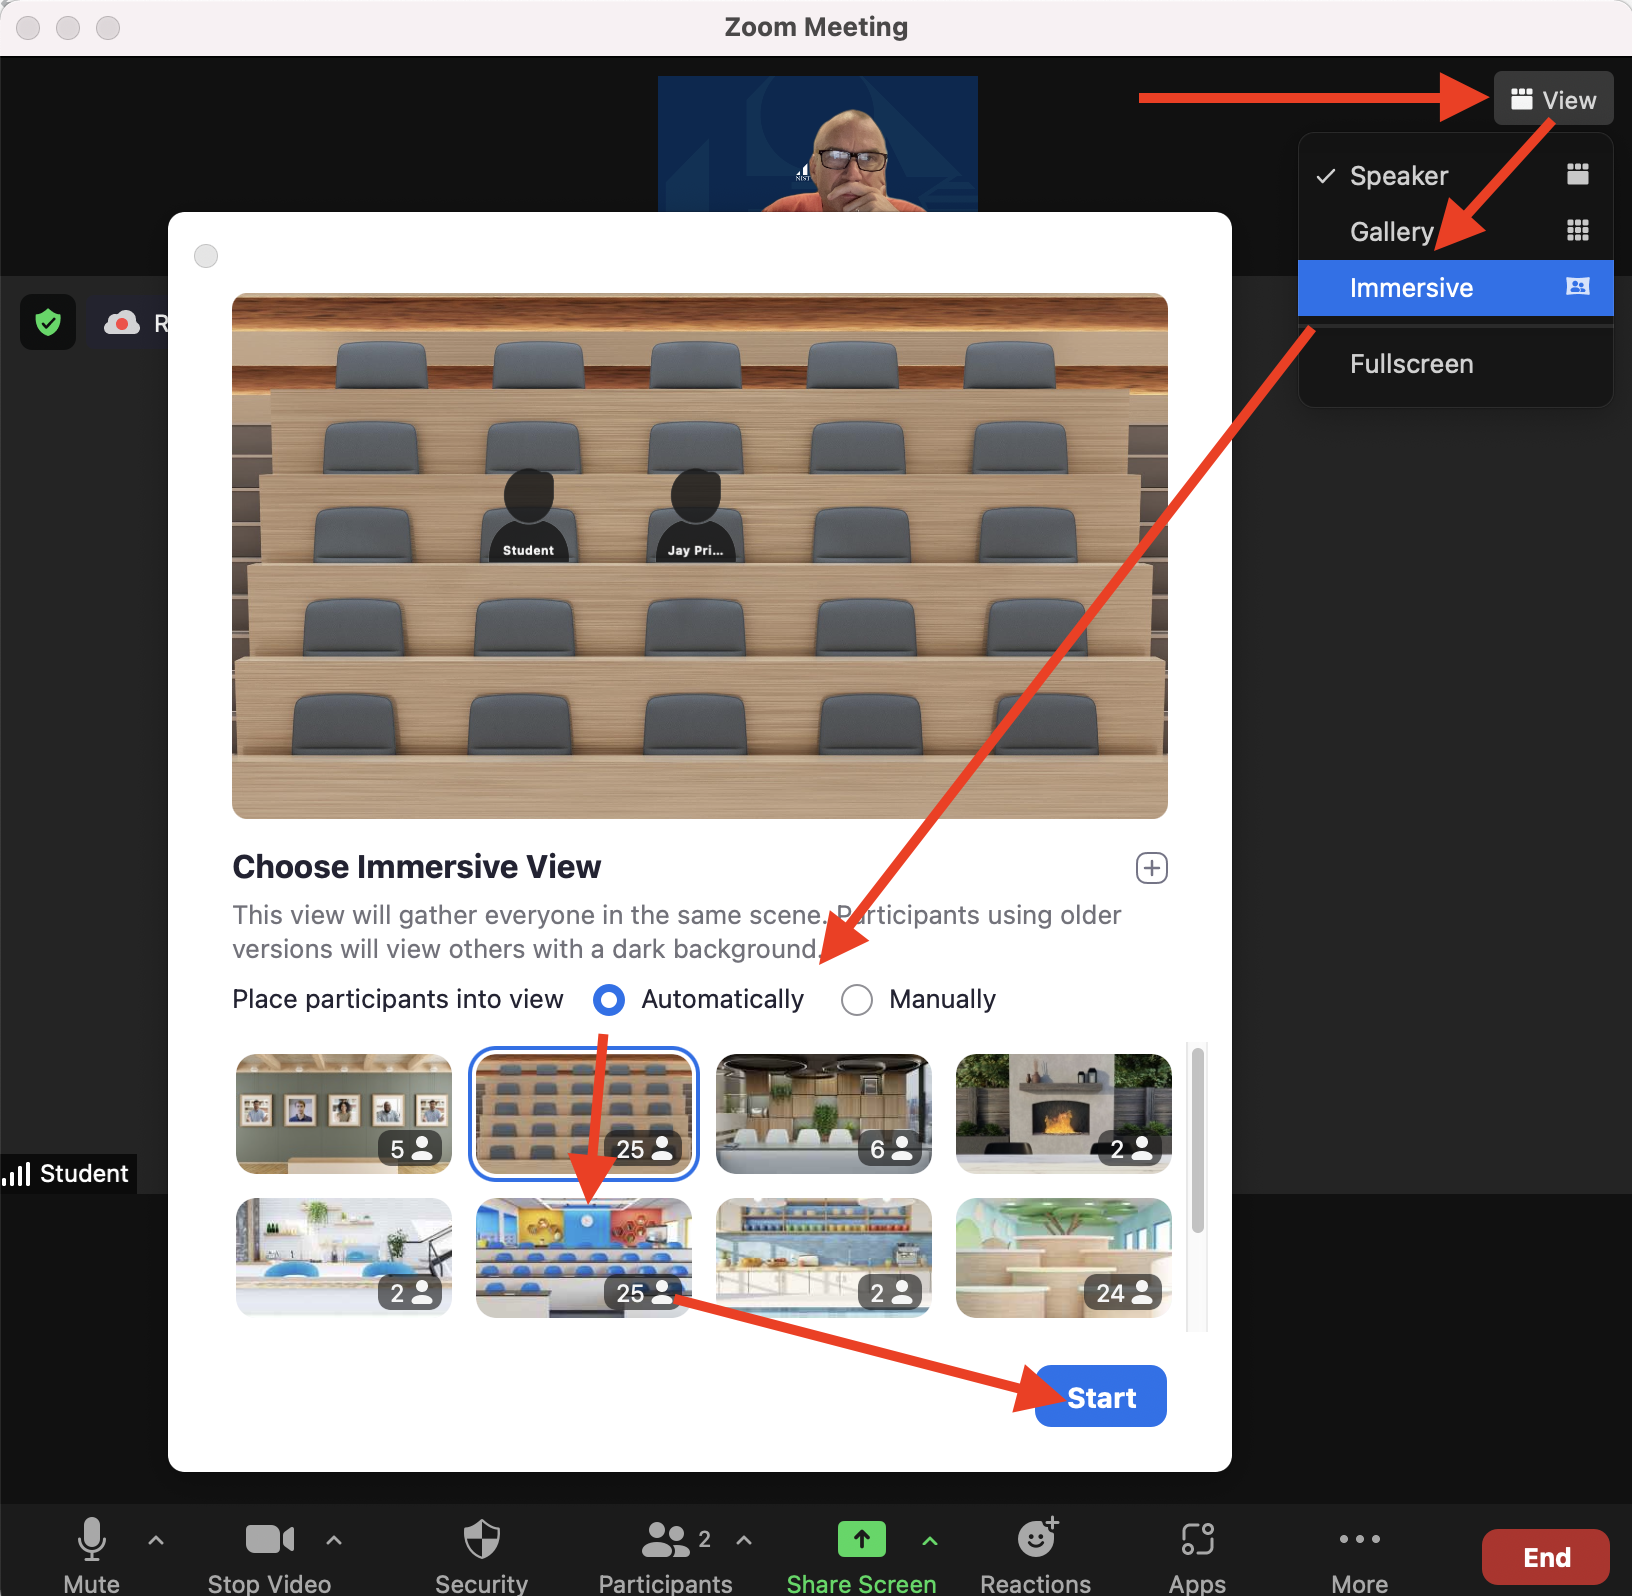
Immersive View
- Meeting hosts (only) can select Zoom’s Immersive View. When enabling Immersive View, hosts will have the option to automatically or manually place participants into a virtual scene of their choosing. Hosts can also easily move participants around that scene and even resize a participant’s image for a more natural experience.
- Current views are available for 2, 5, 6, 24, or 25 participants
- Immersive View does NOT work in Breakout Rooms.
- The Immersive View will end and be replaced by screen sharing.
- Recording of Immersive View is not yet supported.
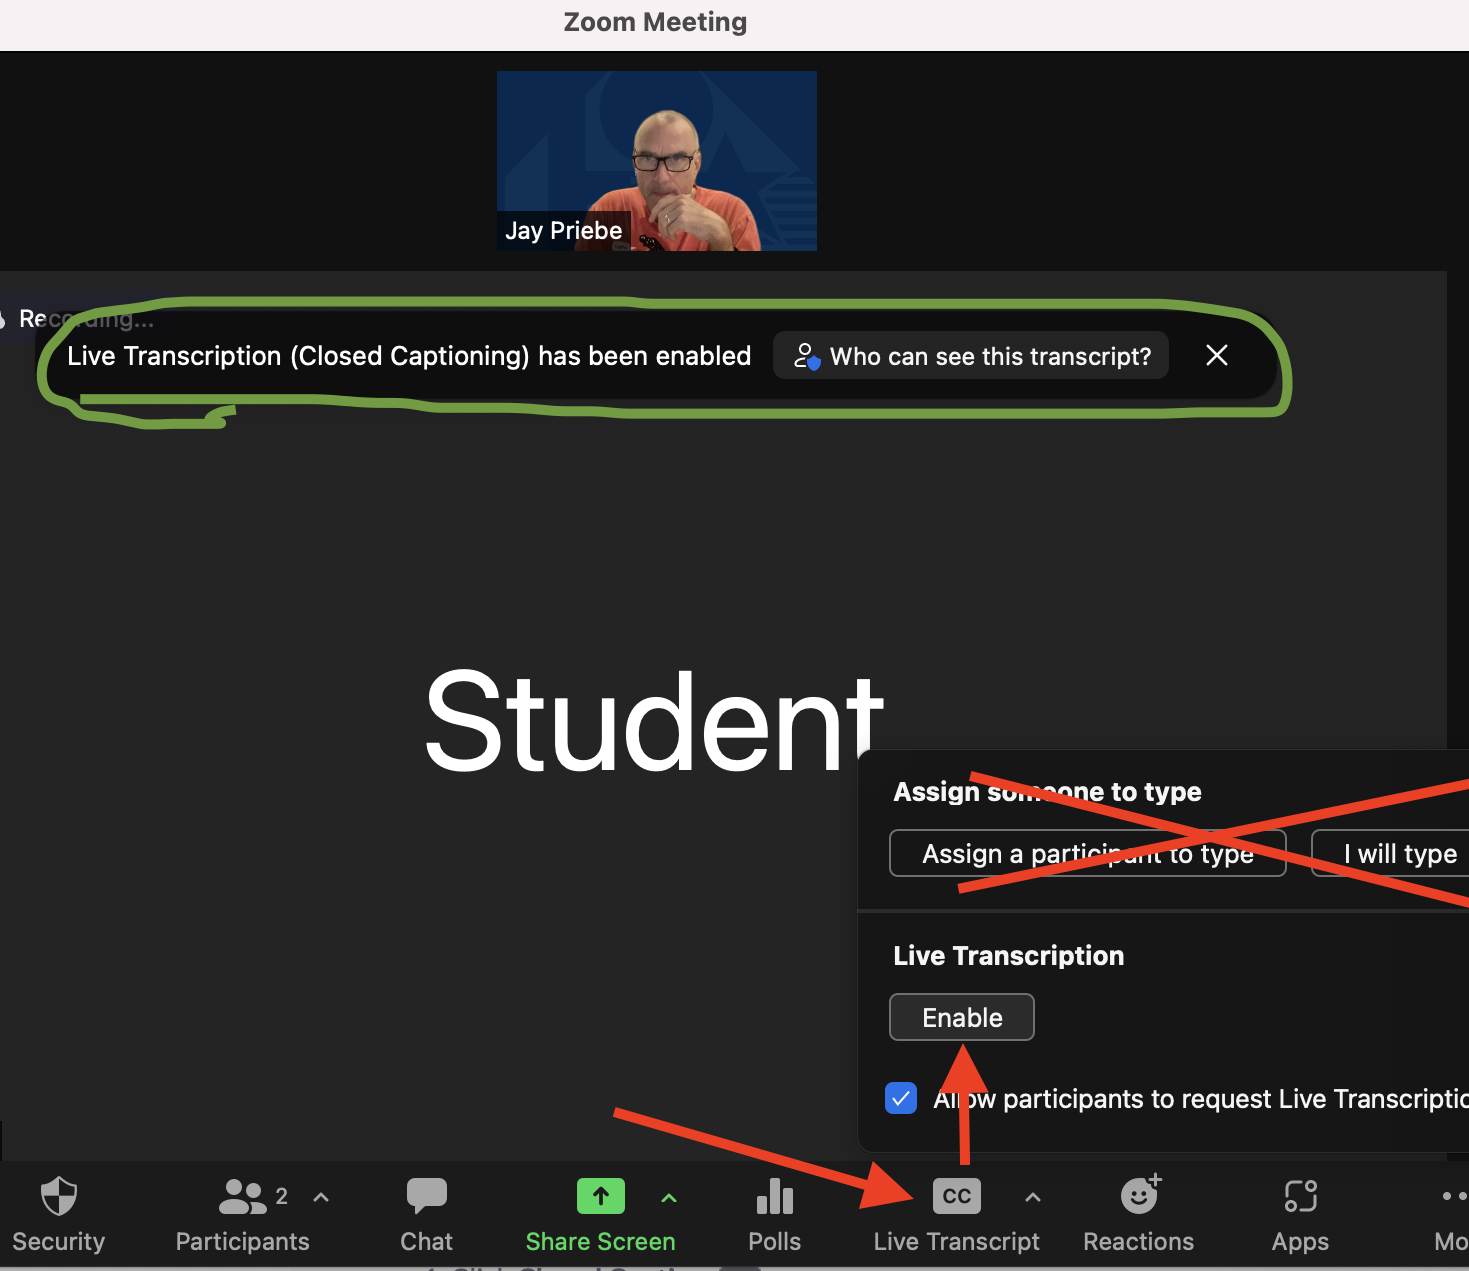
CC Live Transcribe
- In meetings, the host can enable Zoom’s live transcription feature that can automatically provide captions/subtitles.
- Students can also request to have transcription enabled.
- Live transcription currently only supports English. The accuracy of the feature depends on many variables:
- Background noise
- Volume and clarity of the speaker’s voice
- Speaker’s proficiency with the English language
- Lexicons and dialects specific to a geography or community
- Live transcription is currently not supported in breakout rooms.
- Click CC Live Transcript button then Enable. Participants will see a pop-up message that Live Transcription has been enabled.
- Usage suggestion – enable when there is a speaker giving instructions or content or for explanations and disable for work time or back and forth discussions.
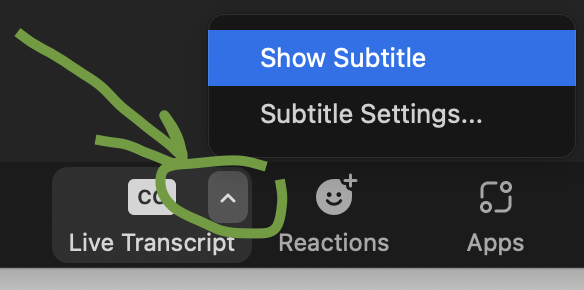
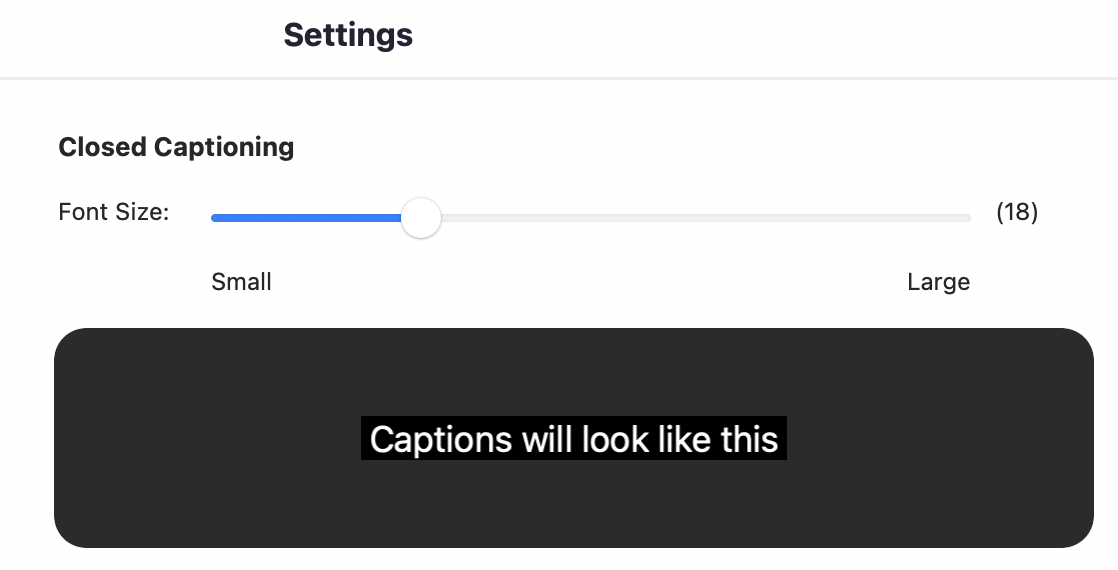
- All meeting attendees can then choose whether to view the subtitles or not. They can also set the font size within Subtitle Settings.
Hybrid Learning with Two Devices (iPad + Laptop)
This video (4 mins 37 secs) gives you a full explanation and a taste for how your classroom display and Zoom can look when using two devices and Zoom in blended learning.
Run and project Zoom meeting on classroom display without any audio. Then join the same meeting with your iPad with audio connected. Present content from the iPad while being mobile. This video explains more.
Large Meeting/Webinar Protocol
Please use these questions/checklist to best prepare for any “large” meeting/webinar you will host. If you need any assistance with the recommended settings, please ask helpdesk@nist.ac.th or a coach.
Meeting vs. Webinar?
Roles
- Host, cohost, attendee
- Who needs access to which meeting controls?
- This is explained more in the Webinar guide (above).
- Do you have a cohost? Large meetings need a cohost to manage logistics, i.e., chat, mute, let in late participants from the waiting room, address technical issues.
- Have you given them co-hosting privileges?
Meeting/webinar considerations.
- As people are joining, will you display a meeting title slide and music?
- Appropriate background setting and noise for the host(s) & cohost?
- Is “mute on entry” turned on?
- Is or should “only authenticated users may join” turned on (need to be off for non-NIST participants)?
- Do you want Chat turned on for participants/hosts?
- What about private chat?
- Is Q & A turned on?
- Are reactions turned on? Will you ask participants to use them?
- Is or should the waiting room be enabled?
- Should participants be allowed to rename themselves?
- Should participants be allowed to unmute themselves?
- Should participants be allowed to turn on video?
- Is annotation turned on/off?
- Should focus mode be enabled (where host sees all videos, but participants only see host)?
- Are removed participants allowed to rejoin?
- Have you enabled do not disturb on the device you are running the Zoom meeting (to have no pop-up notifications or sounds)?
Administrative Tips
Scheduling Interviews for Others
- A user can assign or delegate a user or multiple users in your account to schedule meetings on your behalf.
- When scheduling a meeting, the host can designate another Licensed user at NIST to be an alternative host or hosts. Any alternative host can start the meeting on the host’s behalf.
- According to Zoom, the recording settings for the interview will be determined by the settings on the host account.
- Office staff with a Licensed account can create scheduled Zoom Meetings for interviews.
- Licensed users on can host up to 2 meetings at the same time but not on the same device. Both meetings need to be started by the original meeting host or by an alternative host. The host can leave the meeting and pass host privileges to another user if needed.
Enable Share Screen on First use
This only has to be done the very first time you open Zoom on your macbook.
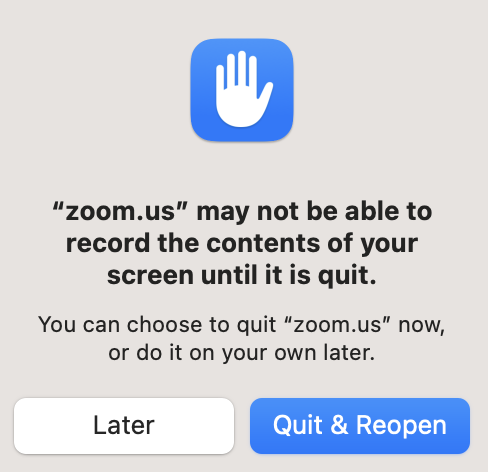
The first time you try to share your screen, zoom will ask you permission to share your screen. To allow this Zoom will have to be closed and reopened so it’t usefull to run through these steps before you host an actual meeting.
- Start a new meeting and press the share screen button
- If Zoom has no access to screen sharing you will see the exclamation marks like on the screenshot below
- Zoom will ask you to give permission to share your screen.
If you don’t see the below window, it might be hiding behind the Zoom window. Minimize Zoom and click the “open system settings button”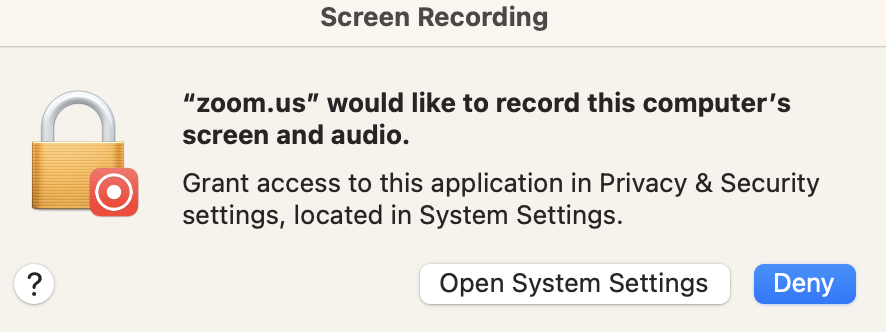
- Set the Zoom slider to “on” (blue)
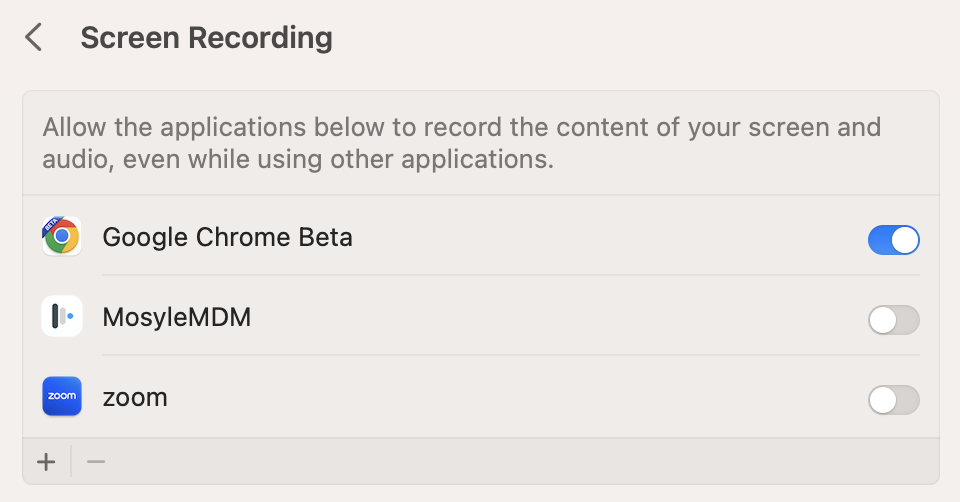
- Zoom will ask you to restart.
Click “Quit and Reopen”